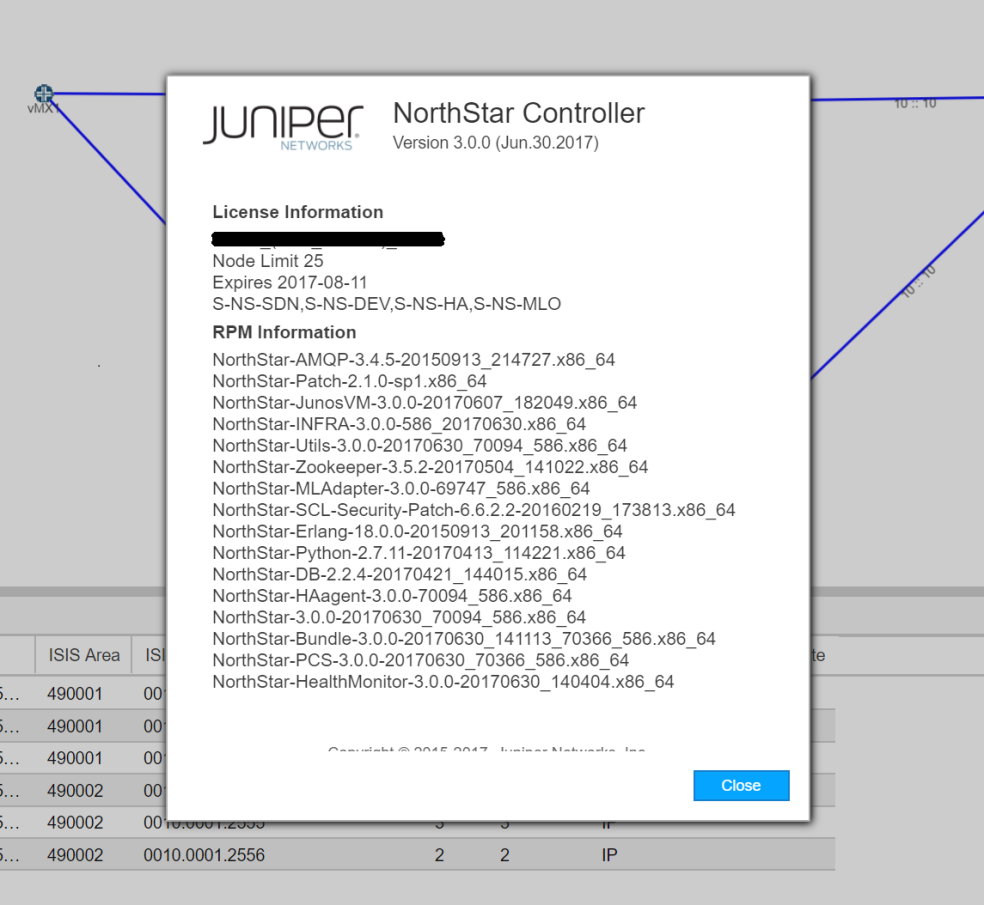
In this post, I’m quickly going to describe how to upgrade NorthStar 2.1 to 3.0. For a detailed installation and user guide refer to the 3.0 release notes here.
Firstly, let’s start off by verifying the current host OS and NorthStar versions. Note. NorthStar 3.0 requires a minimum of Centos 6.7 or above.
[root@northstar ~]# cat /etc/redhat-release
CentOS release 6.9 (Final)
To check the current version of NorthStar, navigate to the about section via the drop down menu located at the top right of the GUI
Download NorthStar, Extract & Copy:
Download the NorthStar 3.0 application from Juniper.net NorthStar download page. Once downloaded, extract the RPM and copy to your host machine. Below I have copied the NorthStar-Bundle-3.0.0-20170630_141113_70366_586.x86_64.rpm to the /root/rpms/ directory.
[root@northstar ~]# ls /root/rpms/ -l
total 3843976
-rw-r–r–. 1 root root 881371892 Mar 11 2016 NorthStar-Bundle-2.0.0-20160311_005355.x86_64.rpm
-rw-r–r– 1 root root 856402720 Jul 11 2016 NorthStar-Bundle-2.1.0-20160710_201437_67989_360.x86_64.rpm
-rw-r–r– 1 root root 2148942508 Jun 30 19:24 NorthStar-Bundle-3.0.0-20170630_141113_70366_586.x86_64.rpm
-rw-r–r– 1 root root 21878016 Dec 28 2016 NorthStar-Patch-2.1.0-sp1.x86_64.rpm
-rw-r–r–. 1 root root 27610536 Mar 11 2016 NorthStar-SCL-Security-Patch-6.6.2.2-20160219_173813.x86_64.rpm
-r–r–r–. 1 root root 536 Mar 11 2016 TRANS.TBL
Backup JunosVM Config
Now we need to backup the JunosVM config via the net_setup utility located in /opt/pcs/util/net_setup.py. At the main menu select option A for Maintenance & Troubleshooting. Then select option 1 to Backup JunosVM Configuration.
[root@northstar ~]# /opt/pcs/util/net_setup.py
Main Menu:
………………………………………
A.) Host configuration
B.) JunosVM configuration
………………………………………
C.) Check Network Setting
………………………………………
D.) Maintenance & Troubleshooting
………………………………………
E.) HA Setting
………………………………………
F.) Collect Trace/Log
………………………………………
X.) Exit
………………………………………Please select a letter to execute.
D
Maintenance & Troubleshooting:
…………………………………………..
1.) Backup JunosVM Configuration
2.) Restore JunosVM Configuration
3.) –
4.) Change Admin UI Password
5.) Change Database Password
6.) Change MQ Password
7.) Change Host Root Password
8.) Change JunosVM root and northstar user password
9.) Initialize all credentials ( 4,5,6,7,8 included)
…………………………………………..Please select a number to modify.
[=return to main menu]:
1
Backup JunosVM configuration
Connecting to JunosVM to backup the config ..
You can verify the results by checking here -> /opt/northstar/data/junosvm/junosvm.conf
Install NorthStar Package
First up we need to install the RPM package
[root@northstar rpms]# rpm -Uvh NorthStar-Bundle-3.0.0-20170630_141113_70366_586.x86_64.rpm
Preparing… ########################################### [100%]
INFO: Centos version installed is CentOS release 6.9 (Final)
INFO: Checking OS requirement
Pass OS checking. Will proceed with installation.
INFO: Current available disk space for /opt is
35%. Will proceed with installation.
1:NorthStar-Bundle ########################################### [100%]To continue the installation/upgrade, please run:
A) To install/upgrade NorthStar + JunosVM in this server, please run:
1. cd /opt/northstar/northstar_bundle_3.0.0/ && ./install.shOR
B) To install/upgrade NorthStar in this server, please run:
1. cd /opt/northstar/northstar_bundle_3.0.0/ && ./install-vm.shOR
C) To install/upgrade NorthStar + JunosVM + Analytics in this server, please run:
1. cd /opt/northstar/northstar_bundle_3.0.0/ && ./install.sh
2. cd /opt/northstar/northstar_bundle_3.0.0/ && ./install-analytics.shOR
D) To install/upgrade NorthStar + Analytics in this server, please run:
1. cd /opt/northstar/northstar_bundle_3.0.0/ && ./install-vm.sh
2. cd /opt/northstar/northstar_bundle_3.0.0/ && ./install-analytics.shOR
E) To install/upgrade Analytics in this server, please run:
a. cd /opt/northstar/northstar_bundle_3.0.0/ && ./install-analytics.shOptional parameters:
–vm : use this to install NorthStar in 2 VM scenario (default is non-VM)
2 VM means NorthStar-JunOS VM is outside NorthStar-App VM
This is the same as ./install-vm.sh
–setup-fw : re-initialize firewall using NorthStar recommended rules (default: firewall is not changed)
Firewall rules example will be available in /opt/northstar/utils/firewall.sh
–skip-bridge : for non-VM install, skip checking external0 and mgmt0 bridges (default: perform verification on external0 and mgmt0 bridges configuration)
–csd : use this to install NorthStar inside CSD
–ip : use this to change NTAD/Junosvm ip. Example –ip
Next up we need to execute the upgrade script. Depending on your type of install you will need to execute one of the following. I’m using option A as I have a bare metal install.
A) To install/upgrade NorthStar + JunosVM in this server, please run:
1. cd /opt/northstar/northstar_bundle_3.0.0/ && ./install.sh
OR
B) To install/upgrade NorthStar in this server, please run:
1. cd /opt/northstar/northstar_bundle_3.0.0/ && ./install-vm.sh
OR
C) To install/upgrade NorthStar + JunosVM + Analytics in this server, please run:
1. cd /opt/northstar/northstar_bundle_3.0.0/ && ./install.sh
2. cd /opt/northstar/northstar_bundle_3.0.0/ && ./install-analytics.sh
OR
D) To install/upgrade NorthStar + Analytics in this server, please run:
1. cd /opt/northstar/northstar_bundle_3.0.0/ && ./install-vm.sh
2. cd /opt/northstar/northstar_bundle_3.0.0/ && ./install-analytics.sh
OR
E) To install/upgrade Analytics in this server, please run:
a. cd /opt/northstar/northstar_bundle_3.0.0/ && ./install-analytics.sh
[root@northstar rpms]# cd /opt/northstar/northstar_bundle_3.0.0/ && ./install.sh
Checking current disk space
INFO: Current available disk space for /opt/northstar is
38%. Will proceed with installation.
This script will install Juniper Northstar Controller Packages
This script may require access to standard Centos Repository to download any missing third party packagesContinue Install Northstar (Y/N)? y
The install script will run for at least 5-10 minutes whilst printing progress output. Once the install is complete, NorthStar will restart its services, et voilà NorthStar 3.0 is a go.

